Microcontroller Programming
My main goal for this week was to iterate on my design from last week. These are the three main tasks that I set out to accomplish:
- Improve the support structure
- Incorporate arduino programming
- Build a sturdier cardboard support box
- Decrease the size of the Hoberman circle so that it won't get caught on the edges of the box top
- Include a button system with a pull down resistor
- Use a potentiometer to decrease the speed of the motor
- Draw a schematic of the circuit system
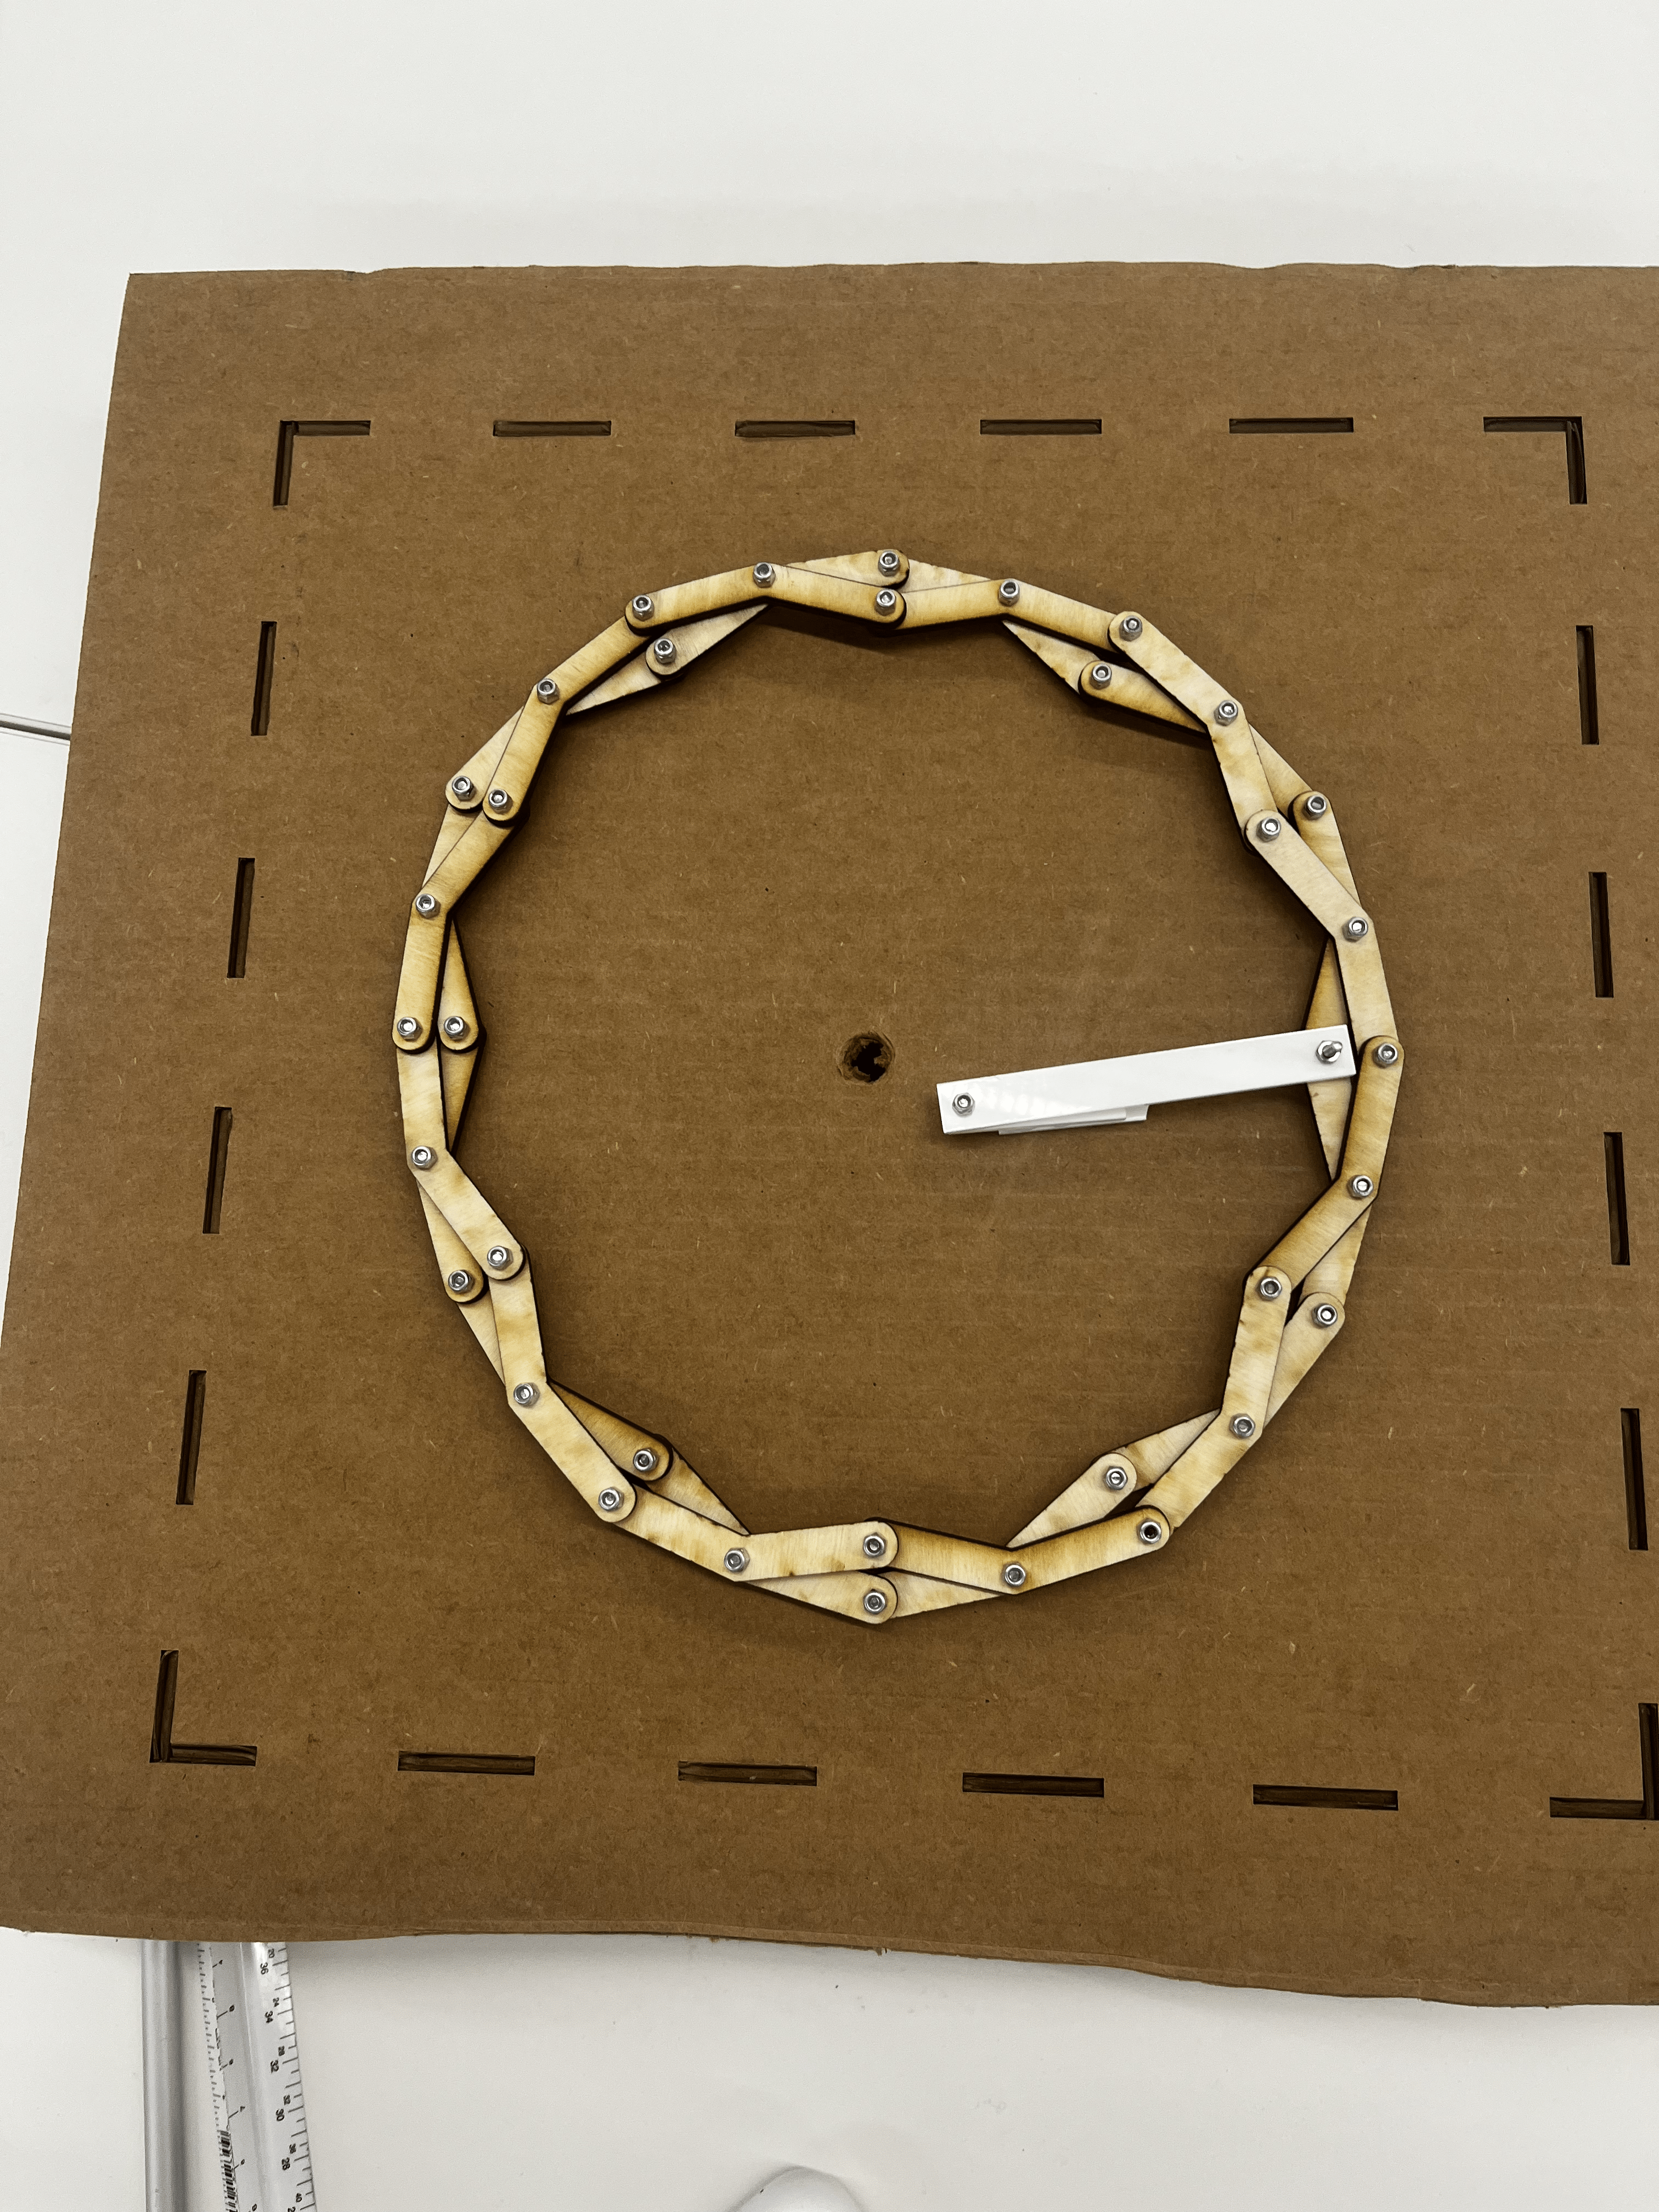
I started on my first task by building a box with a shorter height and larger base. I then remade my Hoberman circle with a smaller length and width and cut the final design out of a 1/8” sheet of plywood. The resulting circle had a diameter of 6”, which fit perfectly on my new support system!
Lastly, I printed out another center stick (one that fit better with the newer, smaller model) and I secured the circle to the box using a screw.
I then integrated a arduino circuit into my design. First, I added an on/off button so that the motor would only run when the button was pressed (see the circuit schematic below). Then, I integrate a potentiometer into the circuit. This allowed me to decrease the speed of the motor (and increase the torque), which ultimately allowed the clock mechanism to move much more smoothly.
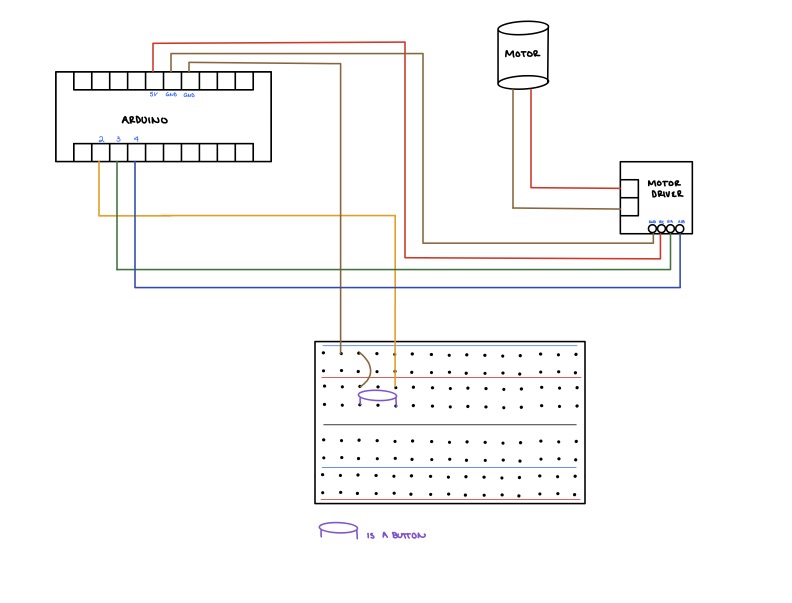
Lastly, I wrote an Arduino script that allowed me to integrate the motor and the button.

In the end, everything came together and my motor system finally worked! Woohoo!