2D Design & Cutting
This week was a crazy one! My computer malfunctioned on Friday, and after an extended visit to the Apple store and securing a temporary replacement, I found myself having to recreate all my Rhino models. Initially, the prospect seemed overwhelming, but redoing them turned out to be a blessing in disguise. The repetition helped me solidify my grasp on various command names and their applications. In the end, this unexpected setback had its advantages, and I now feel much more confident using Rhino!
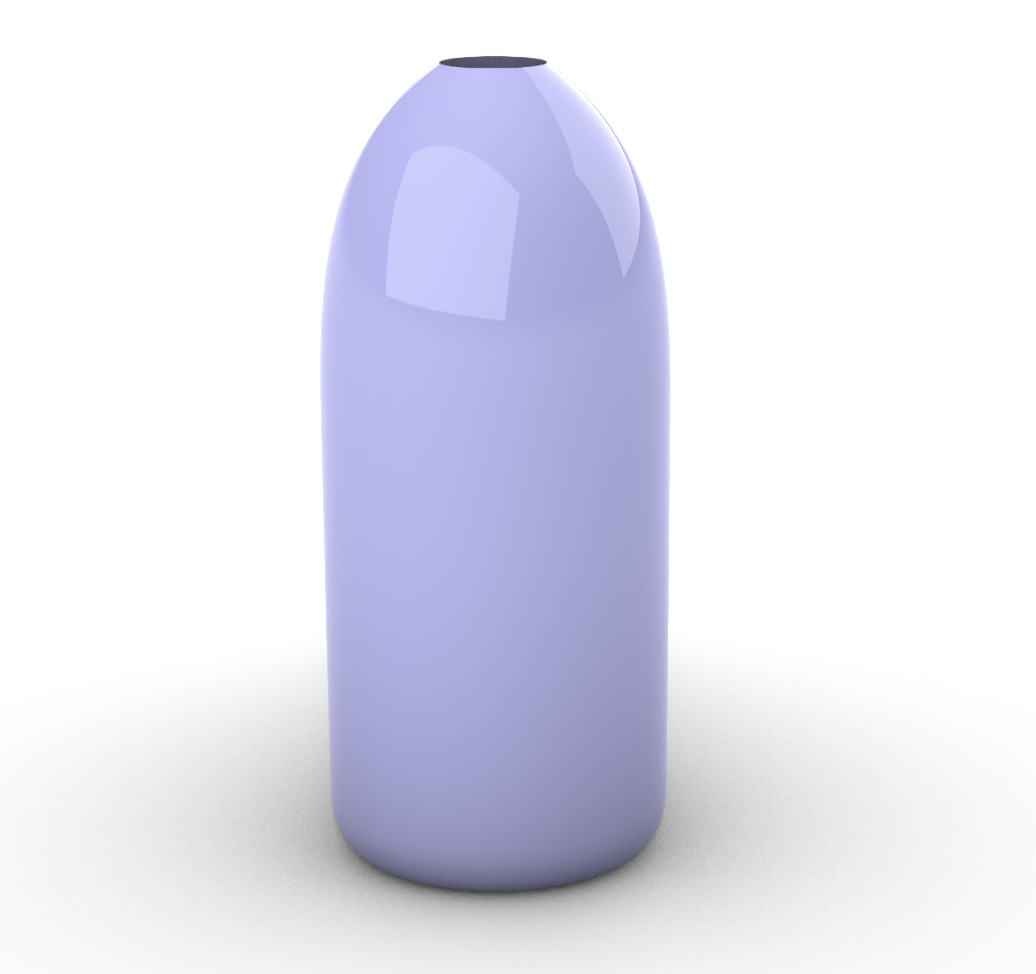
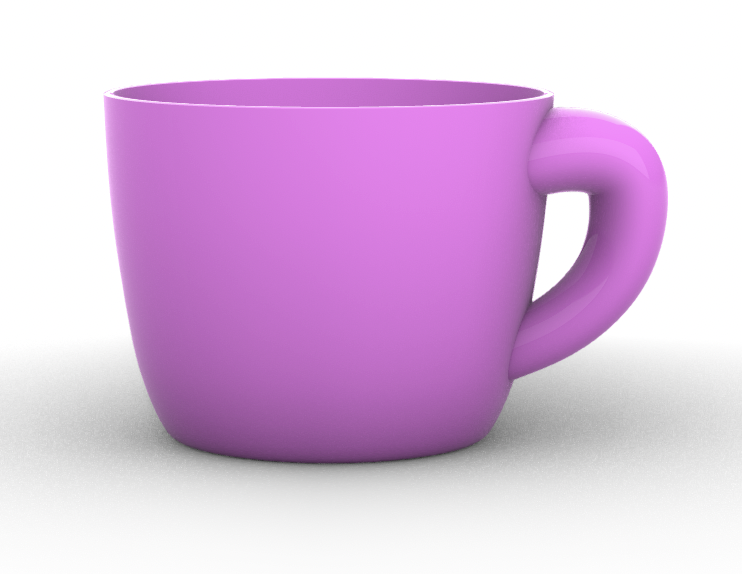
I started practicing my caliper and Rhino skills by measuring and modelling two objects in my apartment. First, I measured my Swell water bottle which had a height of 263.906mm and a diameter of 71.120m. I modelled this shape by drawing the outer curve (the profile shape) using the Curve tool and then turned the curve into a surface using the Revolve tool. I then measured my favorite pink mug which had a bottom diameter of 70.00mm and a top diameter of 90.00mm. I began by making the body of the mug using the revolve curve (in a similar process as above). I made the handle by using the Rail 1 sweep command which allowed me to have the size of the handle change from bigger to smaller.
I also worked through two Rhino (and Grasshopper) tutorials.
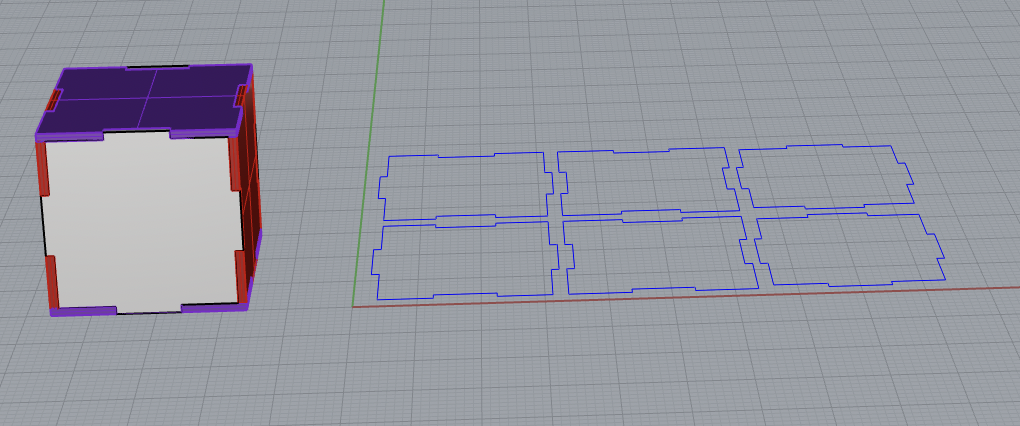
I went through this this Press fit tooth-and-slot box tutorial. First, I created the main square and added the squares on top that I intended to remove. I used the CurveBoolean command to isolate the desired section. Next, I employed the MoveCurve command to compensate for the machine's kerf. Finally, I extruded the curve on each side using the ExtrudeCurve command to render each aspect in 3D, allowing me to visualize the full box. I then used the laser cutter to cut out the box!
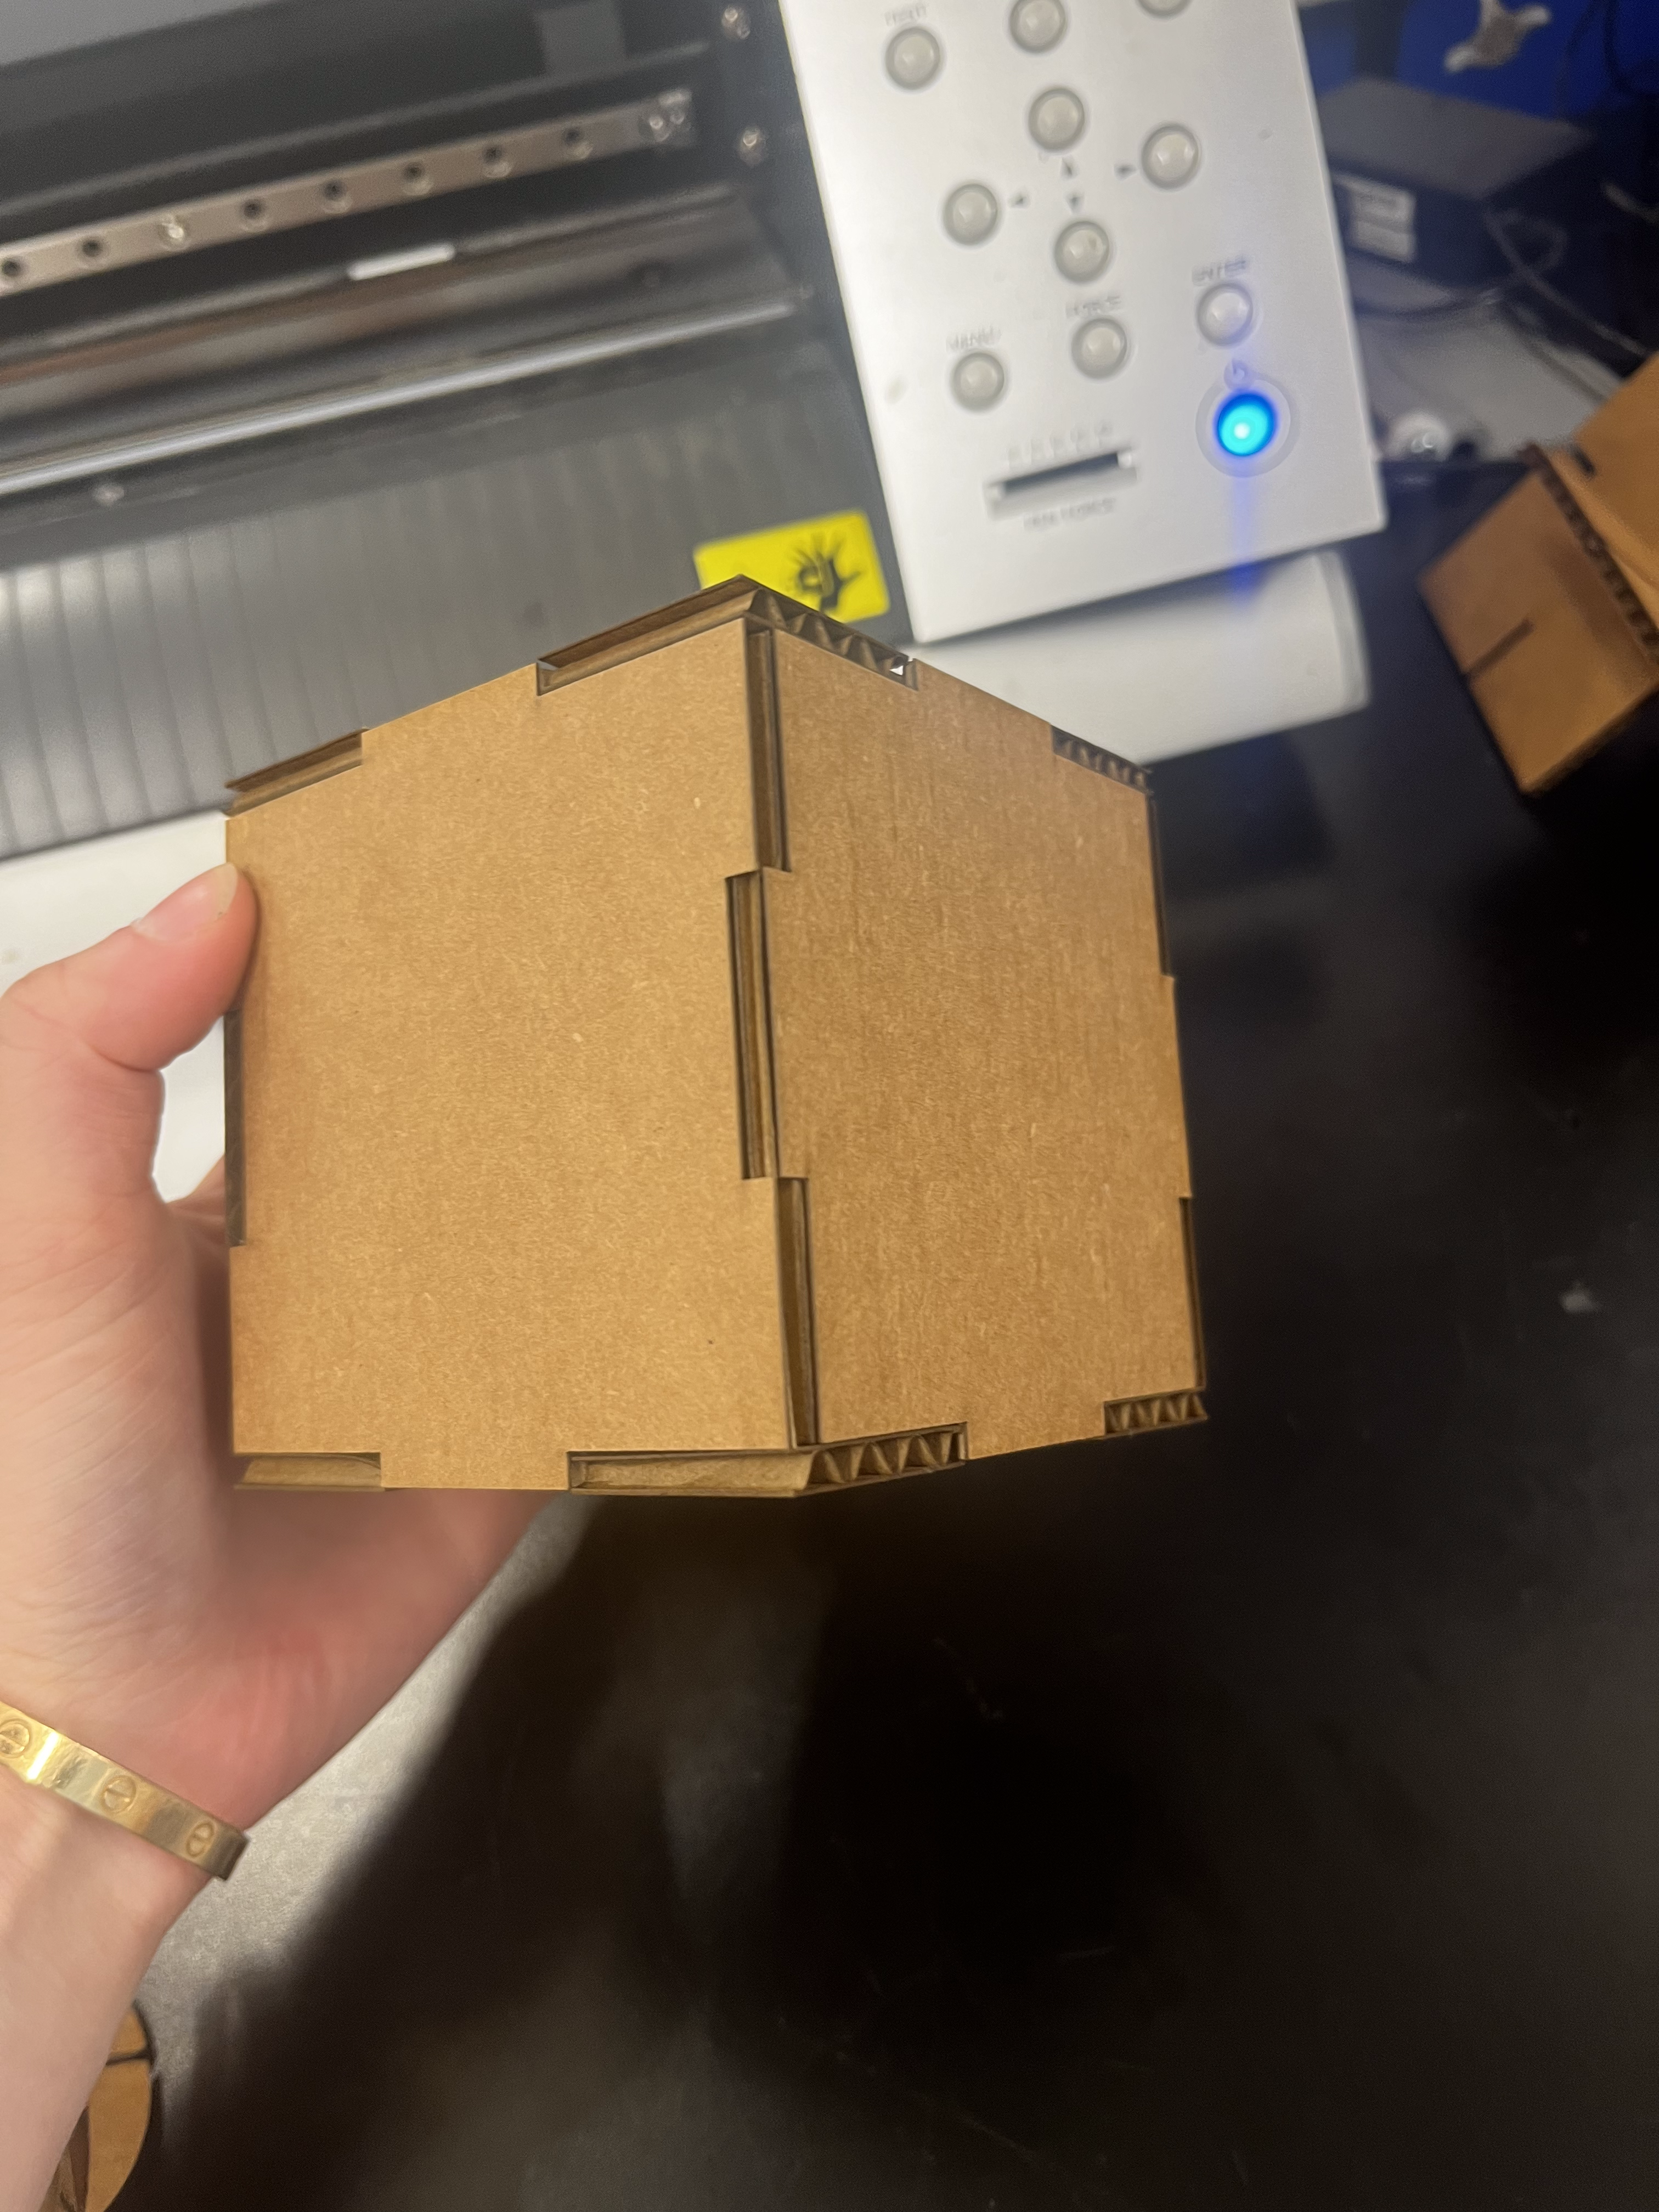
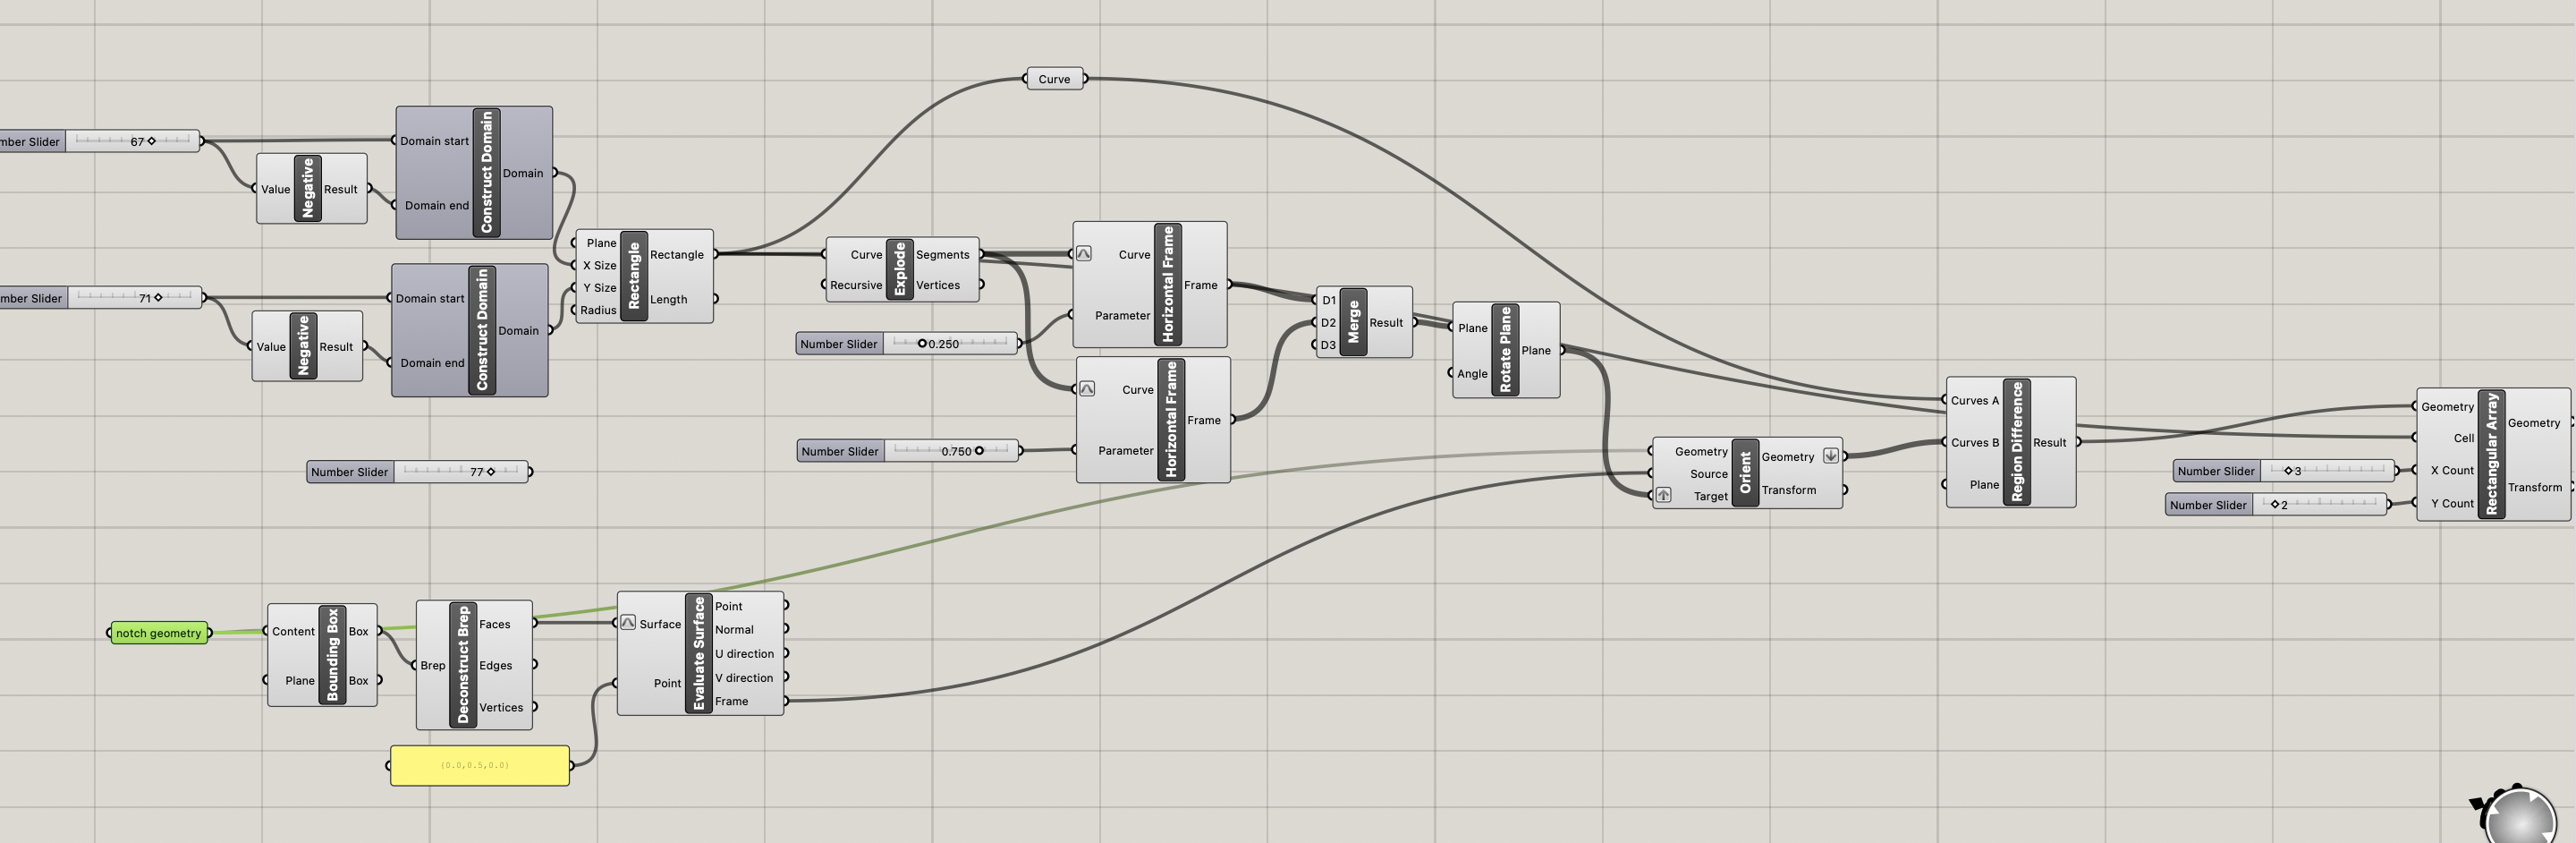
I then proceeded to work through Nathan's Intro to Grasshopper video. After sketching a notch in Rhino and opening Grasshopper, the real fun began. Once inside Grasshopper, I referenced the notch curve from Rhino with the Curve→Set one curve command. To create a box around the notch, I employed BoundingBox and then further dissected the result using Deconstruct Brep. To pinpoint a specific position on the surface, I made use of Evaluate Surface after reparameterizing it, and then visualized the point using the Panel command with curly braces notation. For the rectangle, I began with the Rectangle command in Rhino. To define its domain in both the X and Y directions, I used ConstructDomain and adjusted the dimensions with the Number sliders. Breaking down the rectangle's components was achieved using Explode. To establish frames along the rectangle, I turned to the HorizontalFrame command after reparameterizing and adjusted its orientation with a slider. The frames were then rotated using Rotate planes with a pi/2 rotation value. Finally, to incorporate the notch into the rectangle, I used the Orient command, specifying the geometry, initial plane, and final plane. To subtract the notch shape from the rectangle, the RegionDifference command was employed. I then arranged the notched rectangles in a grid layout using Rectangular array and finalized my design in Rhino with the Bake function. I then repeated these instructions to make a circle with notches cut out. I laser cut both of these files and put the circular and rectangular pieces together. The width of the carboard was about 4mm but I had to make the notches 3mm to account for the kerf of the laser cutter. The first time I printed my box, the notches fit together too loosely. After some adjustements, I cut the shapes out again, and the notches fit together perfectly!
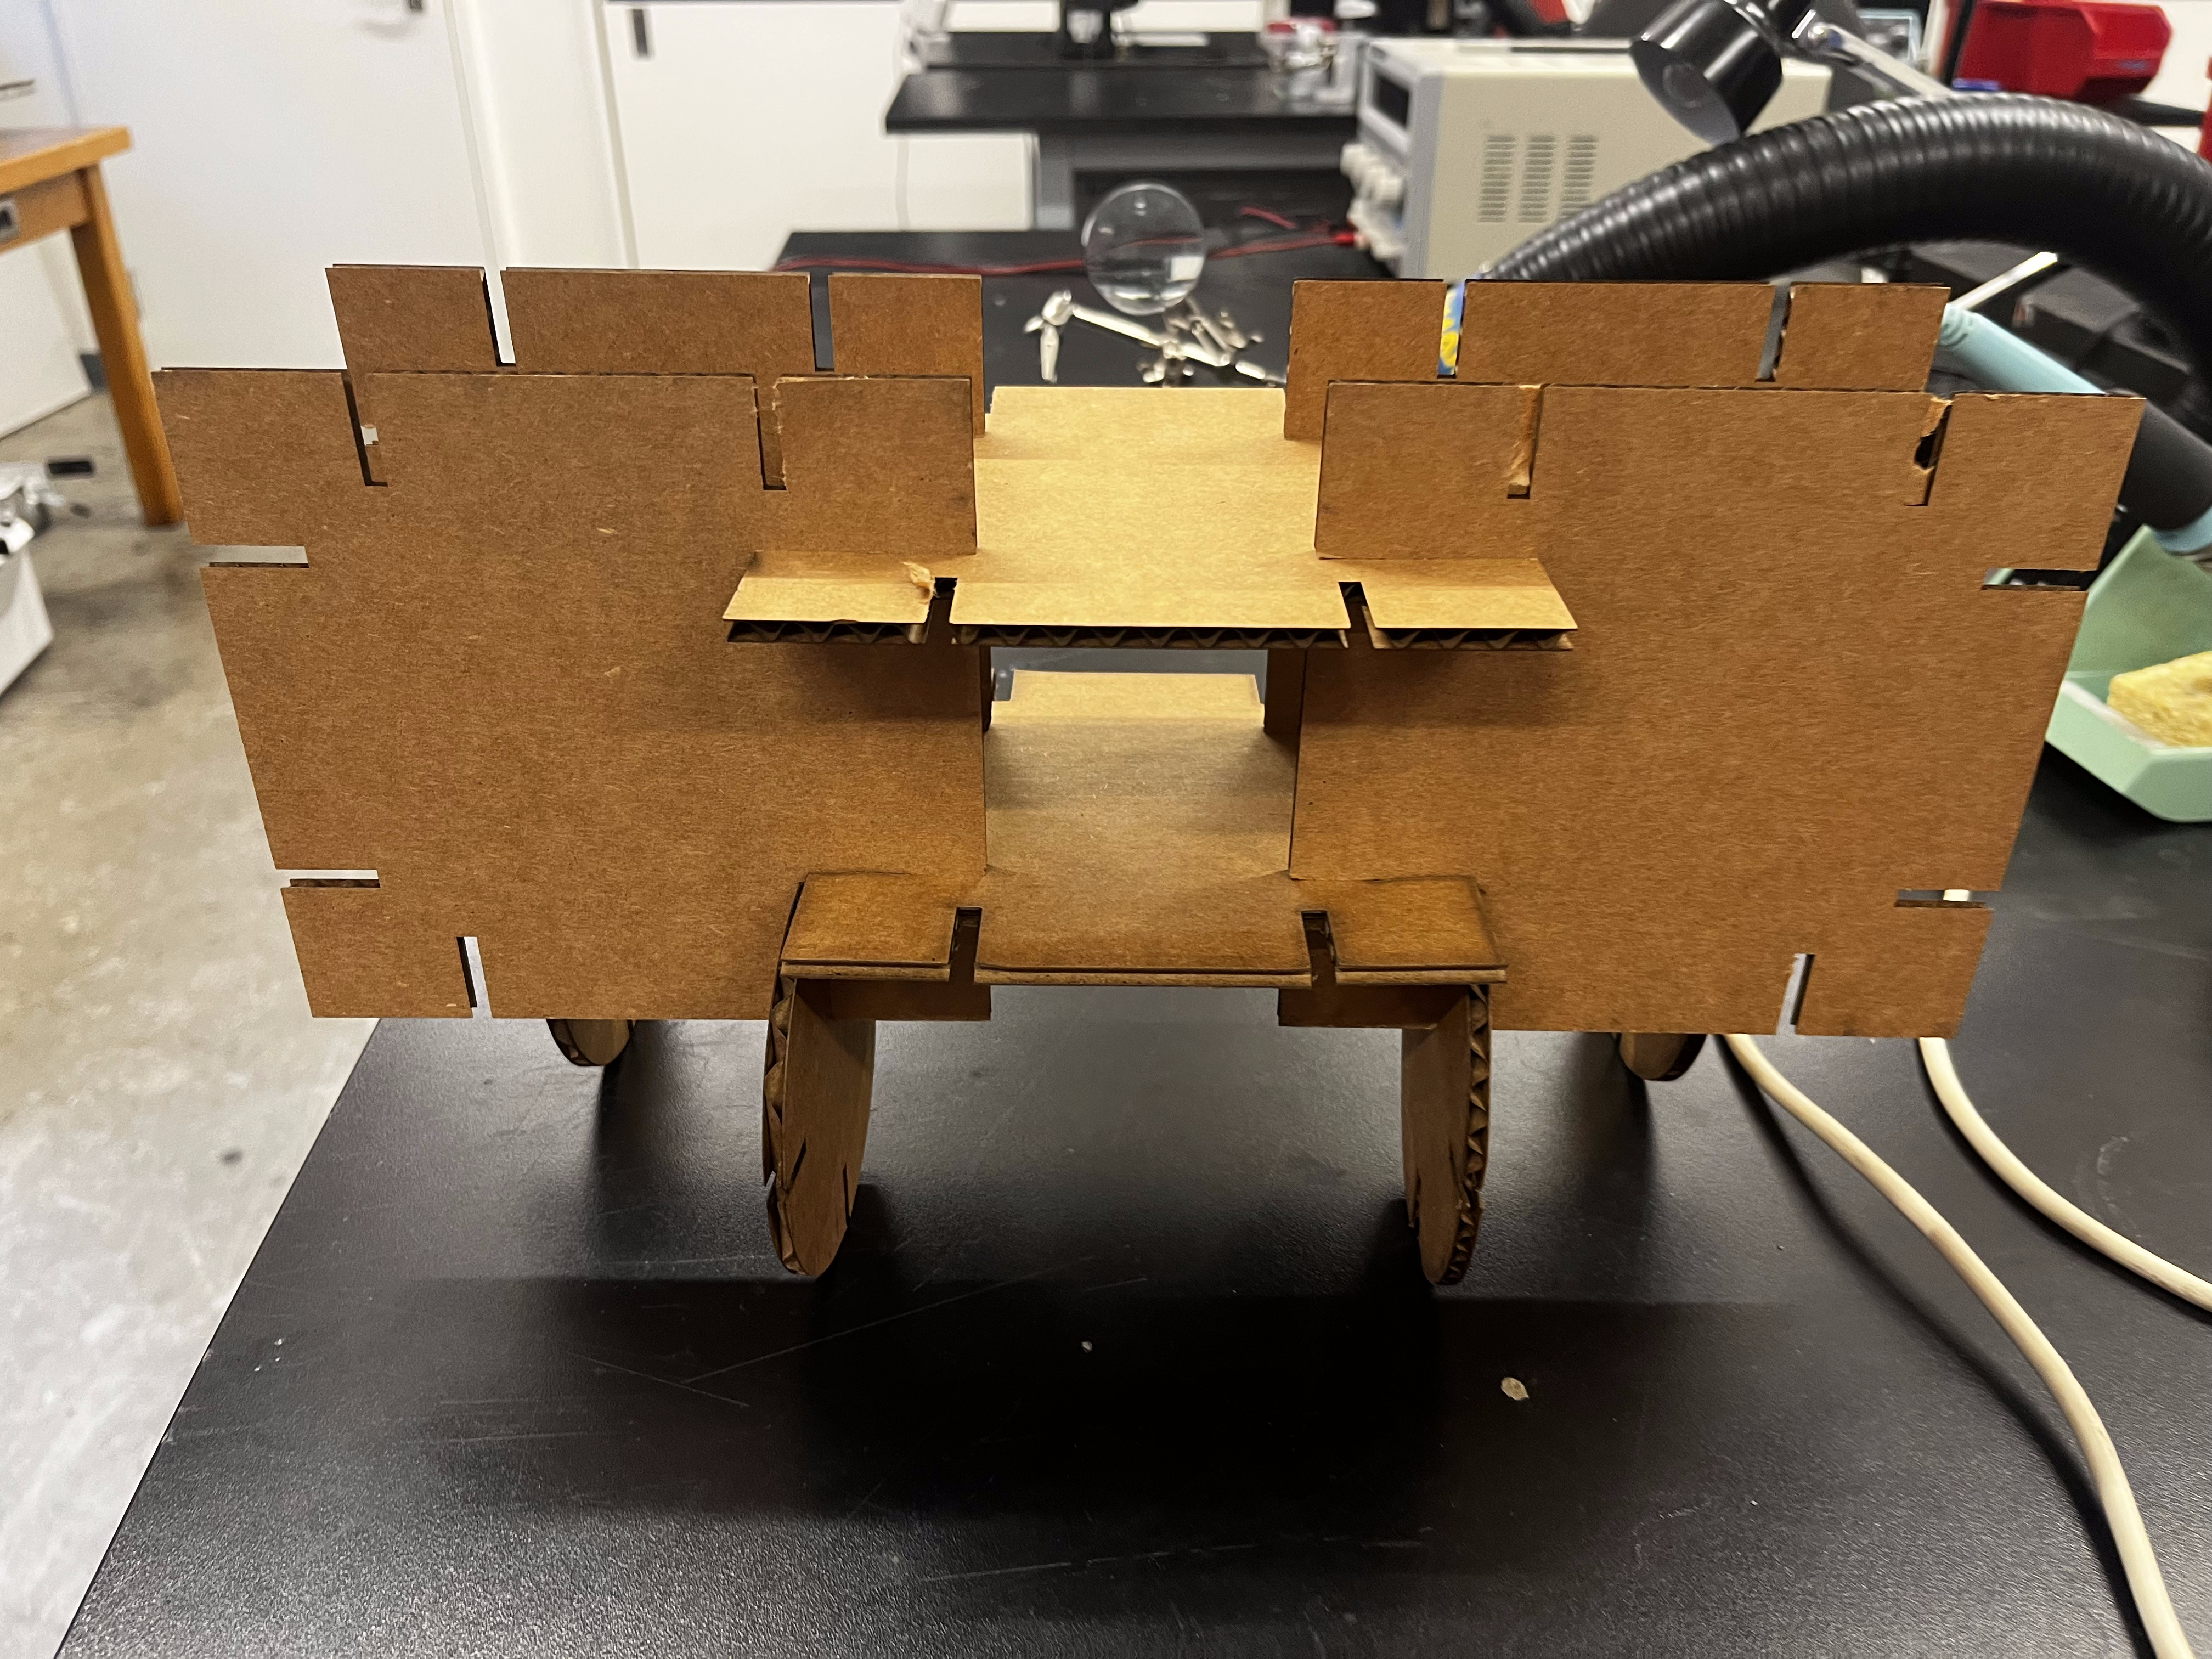
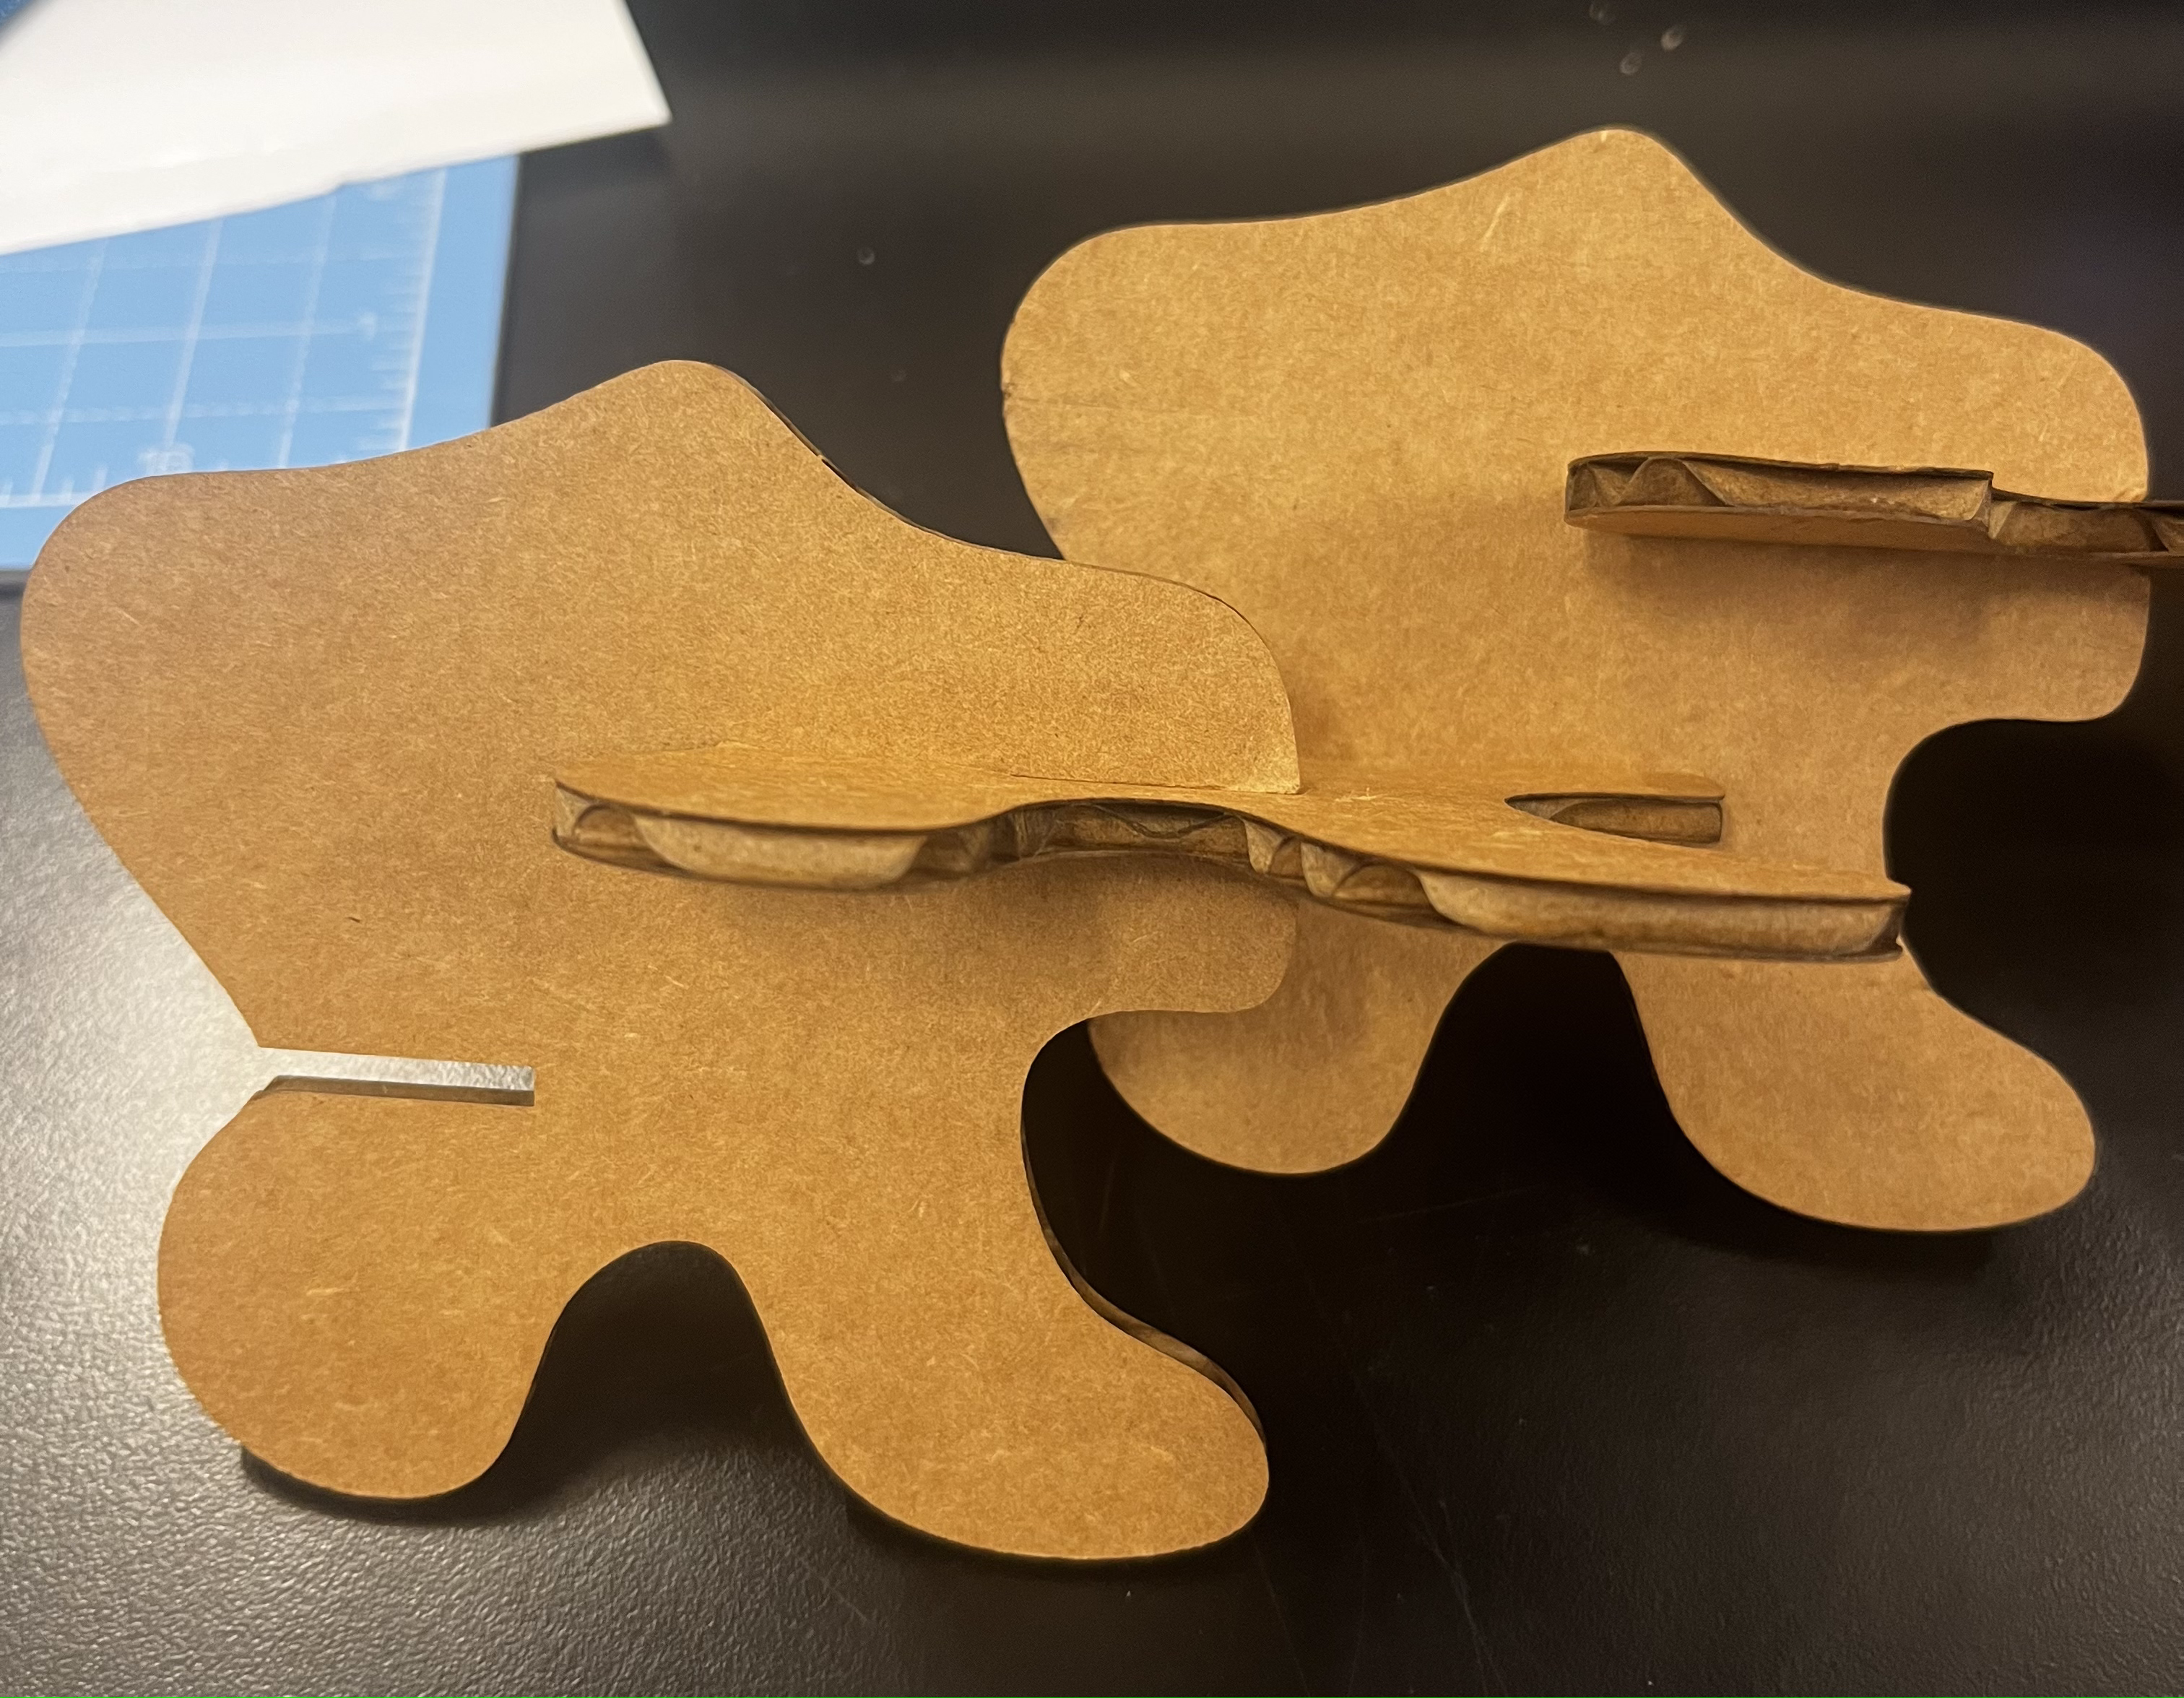
I then crafted my own unique press-fit shapes! One of the reasons I appreciate working in Rhino is its simplicity in creating organic forms. For this segment of the assignment, I sketched my own base shape using the Curve command. After adding notches to my design, I proceeded to cut it out with the laser cutter. I'm really fond of the final design! It had a sense of fun and whimsy, which was precisely my intent. It also resembles a group of animals feeding, which I really enjoy!
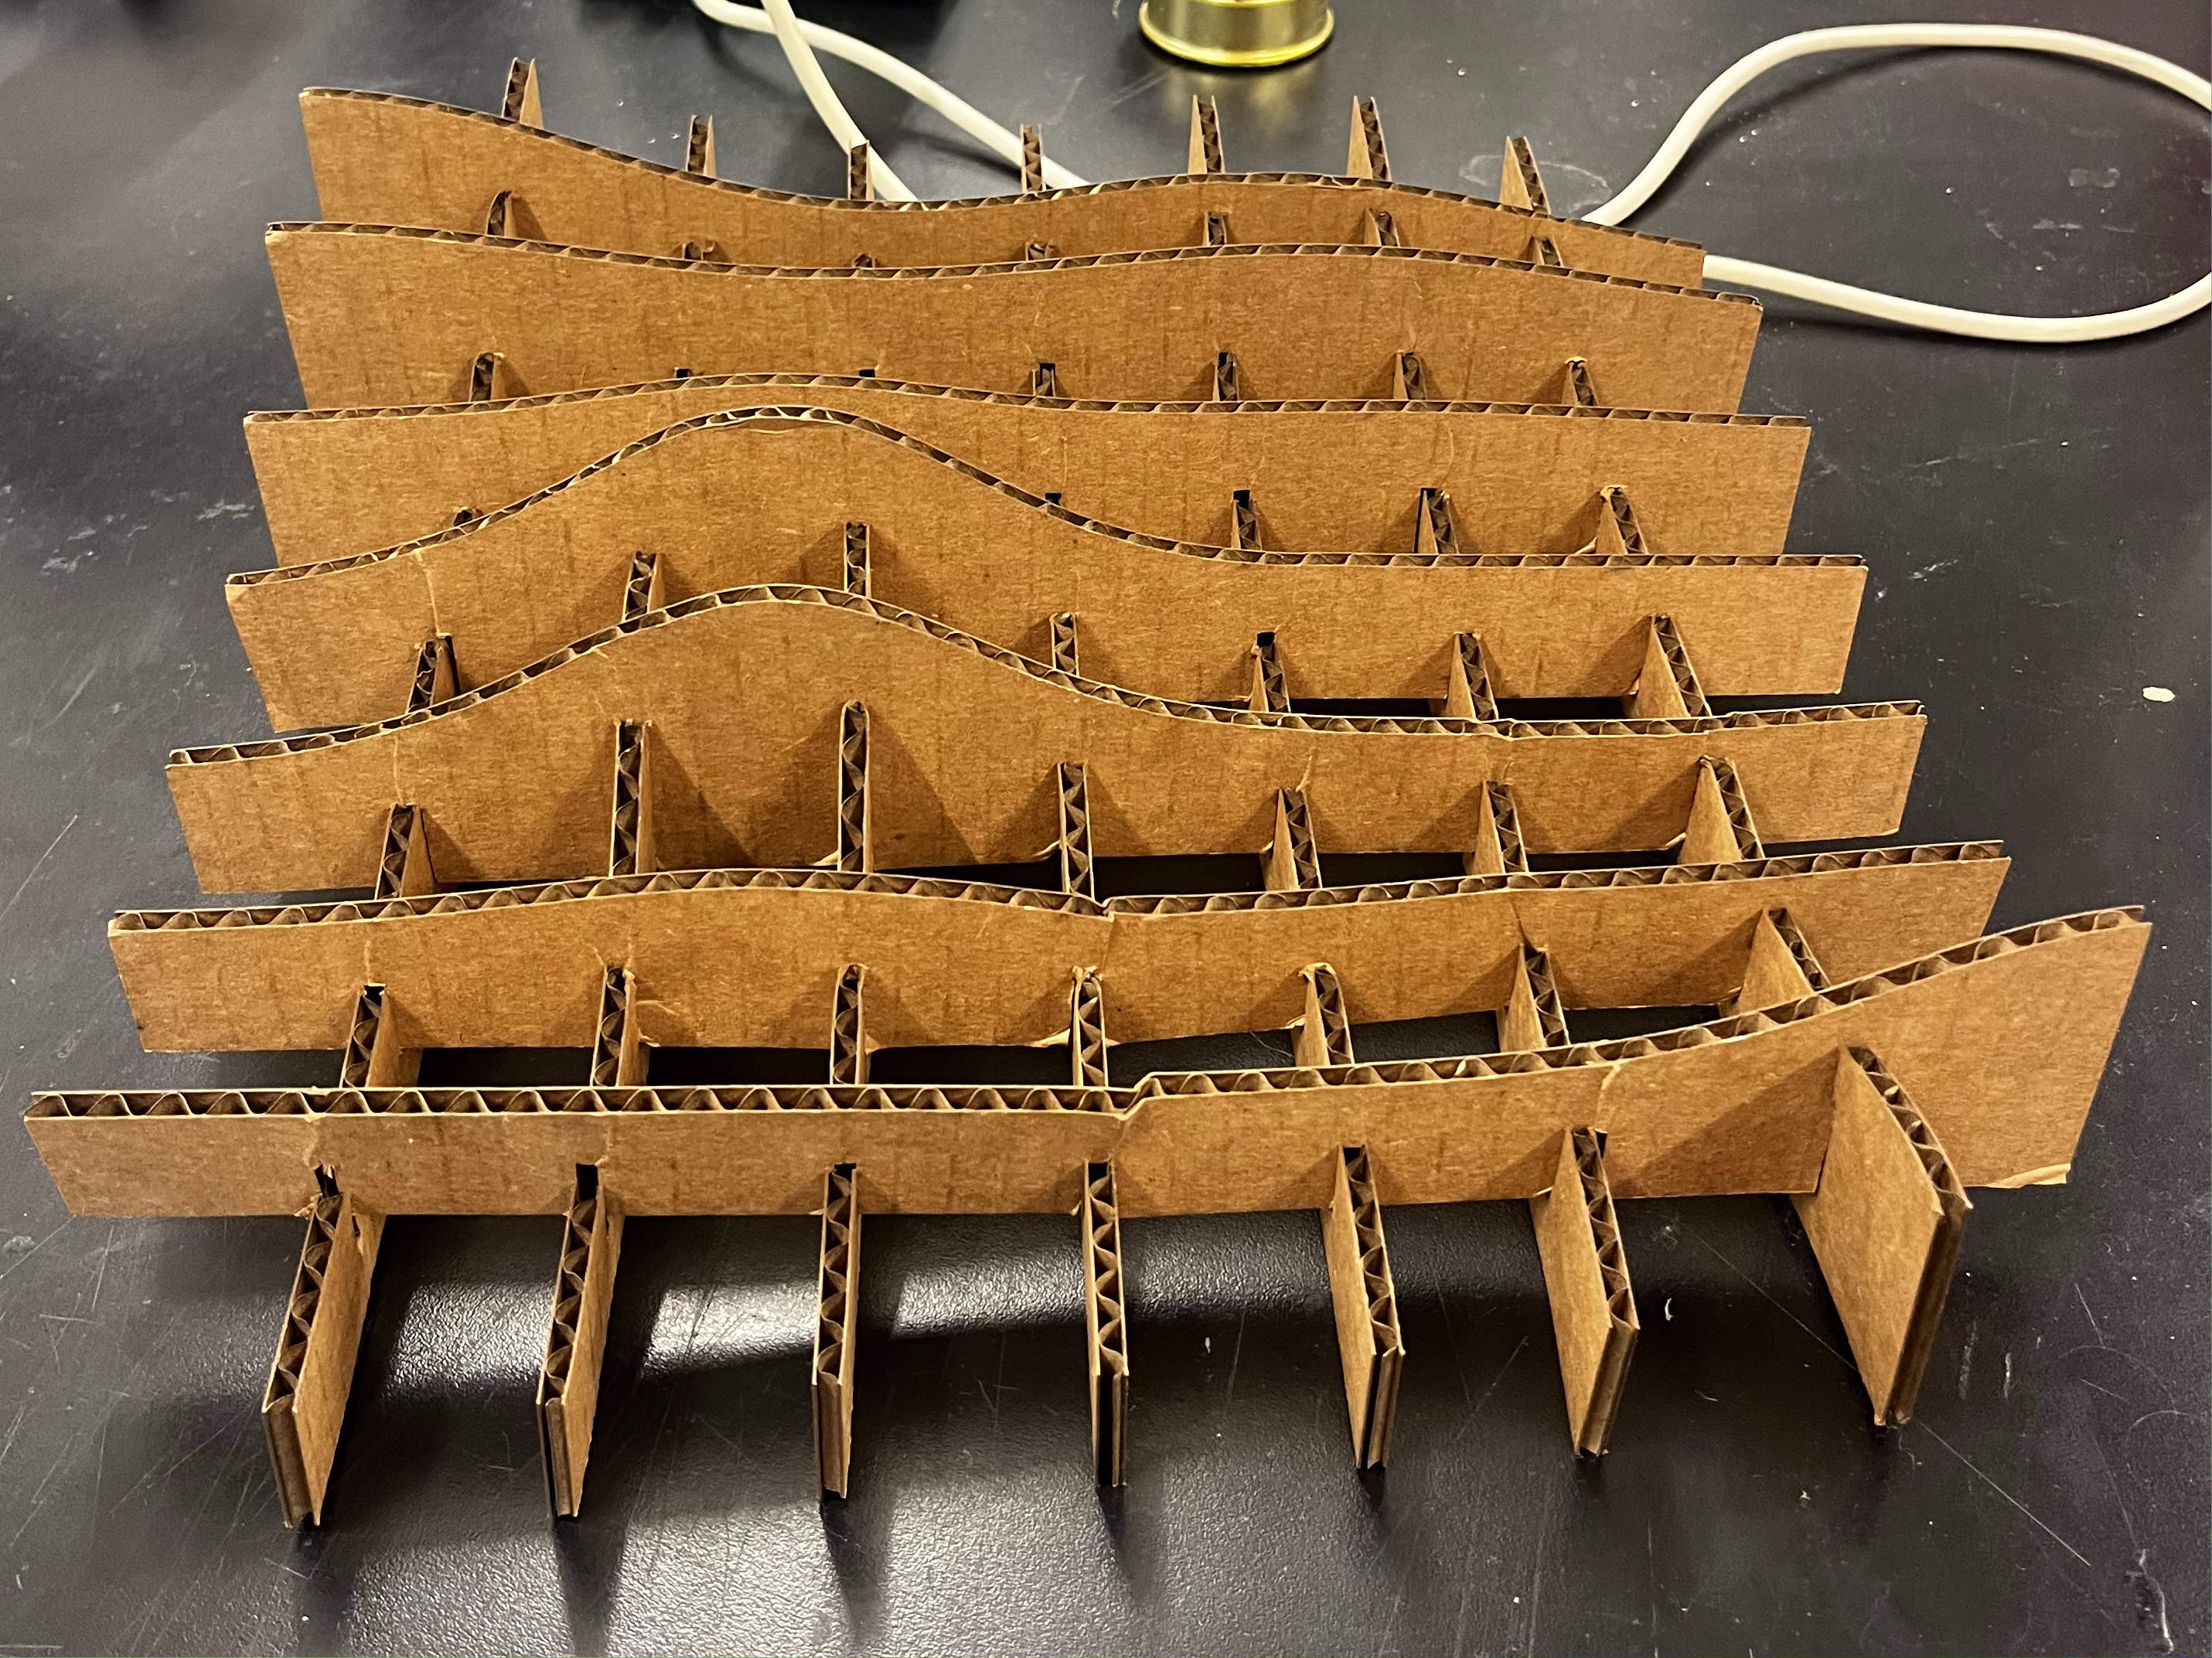
Lastly, I was inspired by the topology class I'm taking to make a 3D press-fit surface. I followed a Grashopper/Rhino tutorial and really like how it turned out!